Translate

Showing posts with label Project. Show all posts

Sunday, November 8, 2020

Pillow Project completed

 Using scraps from a quilt that was made several years ago I finally made time to artistically morph a panel from a pillow into a complementary accoutrement for my boudoir.  lol   

Though it's small, I did hand applique, machine applique, Ink-tense penciled it (which I quickly eliminated) and then painted with pearlescent acrylic paints in a couple of places that I didn't care for to enhance my vision of it.  Lastly it was quilted in a pleasing enough playful designs for a FINISH.  


Since I didn't want to make another pillow form, I inserted a folded bath towel that was recycled from the totaled camper.  It works.


TTFN

Jane

Thursday, May 14, 2020

a finish and planting

Did get this lil' thing done. 

Strip quilted a Moda grab bag featuring Rue 1800 designed by 3 Sisters purchased through Green fairy Quilts with a stash batik from my stash for the background and binding. 
Quilting was 1/4" echo stitched on the colored bands of the varying widths.  The  back side has a similar but different table runner so it's reversible.


Am always amazed that it seems to take me forever with life's interruptions and other fires presented throughout my day for me to finish my projects.  Now am finally realizing that it's me but with a state of grace and I do persevere and get some finished!  8~ /

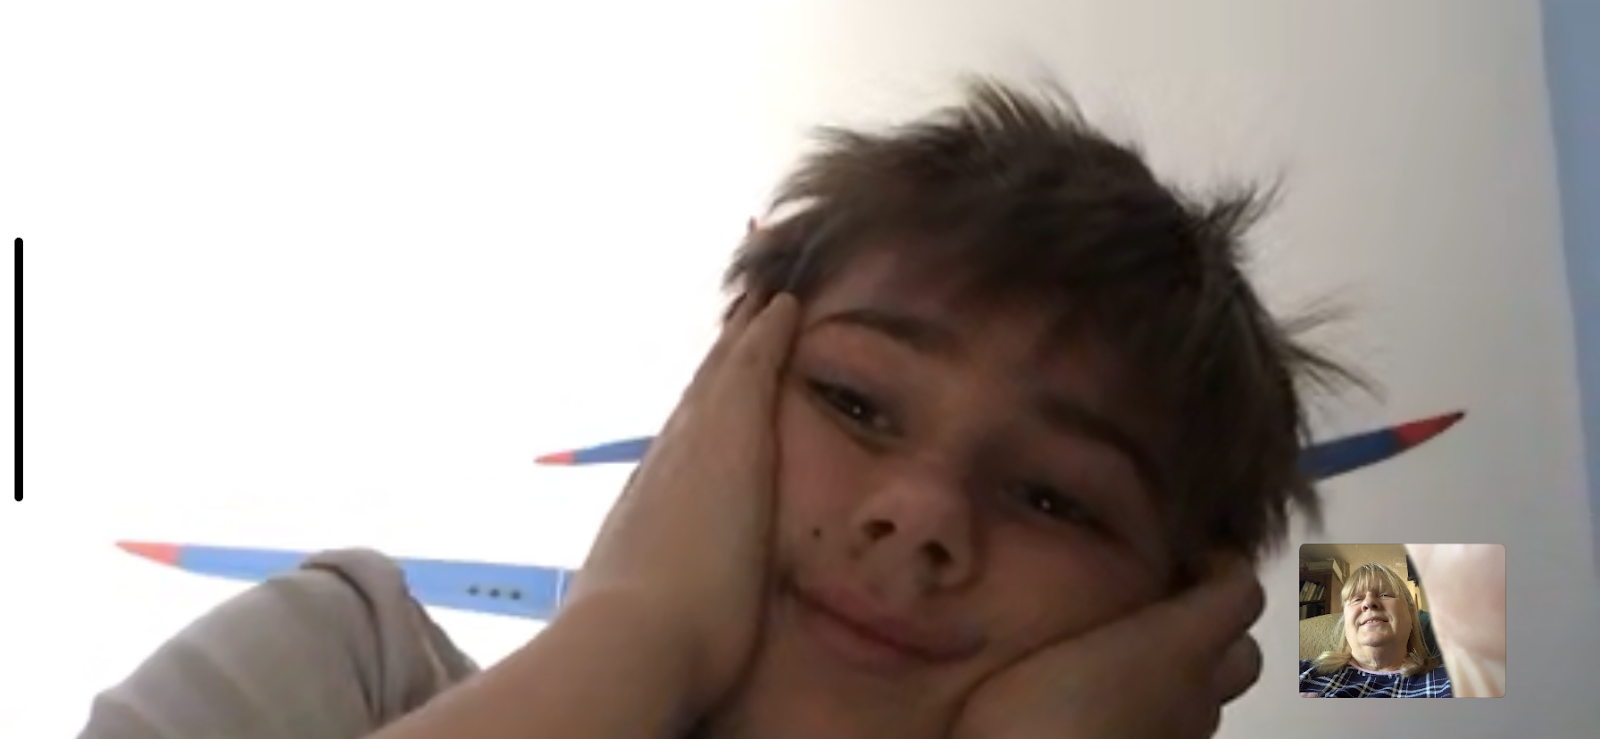
Youngest grandson called me from his I pad.  He's getting quite shaggy and those aren't wings in his hairdo but the ceiling fan in his bedroom.  
 While visiting with him , I yelled DUCK!  He asked why - so mentioned the airplane coming down the runway toward his head.  He turned his perspective to see it and chuckled.  Of course couldn't quite capture that on film.  drats!   He admitted he was bored, and I mentioned it was too bad the social distancing was still going on, that my bathroom needed cleaning.  That's how I raised my children and grandchildren, if bored there is always a chore or two that needs attention.  Thank God they were never truly bored. hee hee   I don't mind him calling me because he's bored either.  we had a nice chat and then his sister who's 14 going on 18 now I'm sure, called me twice that afternoon too. 
Gotta love those offspring.  The eldest grand son who's 26 called too to say he missed us too.  And I know he likes it when we visit but we'll take him out for a meal if we're not hiking and I bring a picnic.  His choice of peanut butter and pickle sandwiches are easy to fix but the several hours to travel I could do without.  He's doing well but is lonely being alone. 

A peek/hint at my next project focus:


We've been gardening when the weather allows as we know when Spring is Truly here, ,it rolls in quickly. 
Stay well.

J


Wednesday, December 16, 2015

Glitter glitter everywhere-


Another area I enjoy decorating through out the year are the wreaths hung on two doors of my home and then at Christmas time especially - a spray is hung over the garden gate doors.
I have a system in the garage for storing all of my seasonal wreaths since it's quite an investment and it's easy to decorate hen they are not all dusty and squished!  With pulling out the December items, they needed attention.  So I started un doing and redoing and made a couple of purchases with more items than I needed as long as I could return what I didn't need with a recent being asking during the transactions.  As long as the items are returned before the Holiday I was told.  No Problem!

The one that was there was so DONE and had served us well for the 15 years it's been there! The photo above on the left shows how bare the decorations were after years of weather, wind and time.  The ribbon started as a burgundy but was so aged all the sparkle was gone, what to do, revamp all of them!
First the front door with the little counted cross stitch pillow was removed from the wreath and all the other bits, then it was decorated with new bows, ribbons, and red and lime Christmas tree balls of different sizes.    The wreath now has white lights allover with a lit red bow.  Adding plenty of candy cane striped doodads to make it even more festive makes me feel wonderful seeing it on the front door.  Very traditional looking scene with the typical red/green colors of the Holiday sign on the outside porch and the Birch wood Reindeer with a coordinating red bow around it's neck welcoming all.


Now for the family entrance side and on the driveway entrance Fuchsia was the color theme.  The spray over the garden gate will be up all winter.  So luckily I found a silver gold ribbons, pearls, fuchsia ornaments, glittery doodads, and varying ornaments made this one really unique.  What do you think?  I think it could easily segue into the Mardi Gras season and beyond!    It truly is OVER the top!  pun intended...


Using many of the same style of decorations for the wreath that hangs on the kitchen door that had to be revamped.  I used plenty of bows,  multi-sized ornaments (some dangling), different flower picks of glittered drums and sprigs, as well as the same "cow udder things" (as DH mentioned last year that were recycled)  to add movement each time the door is used.


It looks really nice and am so happy with those results!  
It's a blessing that even with the recent snow squall that came through, it's holding up perfectly!


This is the system we use to store them.  All of the wreaths fit into monthly marked containers.  The swag and Christmas wreath with those ball hanging down thingies are stored on the garage rafters in plastic bags which require a ladder.   DH and I built two shelves over the garage doors.  One for summer stuff and the other one for winter items.  
System in the garage for storing all the door wreaths.  DH bent some garden hooks and put up a suspended left over  curtain rod.  I can get at these without having to use a ladder, just a nice little hook on a long pole
makes it easy to get down and easy to get back up!

Just had to share with the grands being here last week while school was out, here's a giant Furby cleaning off the car when he arrived at 7:30 am in his pajamas.  That boy runs HOT! and doesn't like to wear a coat.
PGS#3 arriving with here during the school's  Christmas break.  Just turned  7 on 12/8 and is in the first grade.

He's a great little worker.
 Editing this on 1/3/16 since December flew by!

Friday, June 14, 2013

My TAMMY!

First of all, thank you so much Madamme Samm for the wonderful pattern and organizing another FUN blog hop!  Also thanks to the sponsors who so generously donated some terrific prizes, would you believe not one but two Dovo scissors {I heart them- such quality!} and the gingham fabric, old fashioned  appeal with a new twist goodness, {love}. 

When Mdm. Samm did a call out for bloggers who wanted to participate, I didn't waste any time and jumped on board.  Getting to test out her pattern I only had to commit to sharing it with you all on the 14th of June,  Flag Day, how easy is that I thought, so I said YES.
When I received the pattern it was very detailed. Would you believe 71 pages of detail or something so close to that, "YIKES"  I thought to myself, what did I get myself into?!@#!!!    But she had a terrific tutorial actually contained within the confines of the pattern illustrating each step so there could be no misunderstanding what was to be done next.
 Thanks it helped!

But after reading the pattern and gathering my materials together, I became more confident.  The hardest part was finding a hinged bag closure which I couldn't get the correct size in despite several shopping attempts here and out of state.  What to do?  ..... I had a smaller width frame and another that was a bit larger.   I ended up modifying my pattern to accommodate the larger and best frame I had in.   Well, before I get ahead of myself, let me show you the finished bag. 

Would you believe I didn't take any photos of my finished bag empty except for the following two.


The interior of the bag during construction.  Matched up the seams really well on the bottom inside and out,  I was super happy about that!


Okay, who is playing tricks and inserted my Mother's hand in the photo, it can't be mine, whenever did that happen?!

The finished TAMMY's interior showing the side pockets on both front and back sections of the TAMMY.
On the bottom left of the above shot, you'll see where I inserted a loop of MODA twill tape in the outer seam just above the pocket.  This could securely hold keys, a ring of shopping cards, another wallet/coin purse,  etc...


Here's a shot of one side of the TAMMY while it is closed and STUFFED.  


I did assemble this a little differently than the instructions.
I used a hand dyed cluny lace for trim on this side and then sewed the lining across the top incorporating the cluny trim then pressed the seams up.
When I flipped it down towards the inside, I left a small slip of that striped fabric showing for my faux piping, then top stitched the seam line with my favorite #10 Bernina foot.
Voila the Piping look without all the extra work.

After getting the upper portion of this pocket sewn, I lifted the exterior fabric and the fleece and stitched it onto the main purse part so I had the divisions that were in the pattern but also so they couldn't be seen on the exterior of the bag.  LOVE it!! 
The Sunbonnet Sue side with the 3" scissors behind her is the shallowest pocket.  Items can't fall into the bottom crevices of this baby!  The left side also was stabilized so it's not as deep as the actual purse and holds the needle case and the slap it pincushion bracelet. 

The photo below it shows what was held in that one pocket only.

The sunbonnet Sue doll is a needle minder that my grandmother made either a couple of or several decades ago.
While visiting my Mom this past winter in Florida she was using it.  I ooohhh'd and ahhh'd over it because my Grandma made it and Mom kindly gave it to me saying she had another one she could use.  Thanks Mom and (posthumously, Thanks Grandma too), I LOVE YOU BOTH.


This pocket also held my slap on pincushion bracelet I made last year.
What's in the bag you might ask? 
Yes, it's sewing paraphernalia but this TAMMY is large enough for an 7.5" hoop plus some other things!


Want to see what it held in the main compartment?


All of this and a Canon Camera and there was still a bit more room.
Magic Eyes, a 7.5" Clover embroidery hoop loaded with my latest embroidery focus, a ring bundling bobbins filled with DMC floss, a DMC 5, white perle cotton in a perle Bubble, a plastic bag for some bits of thread that could be used up and a Madeira silver floss package besides my camera,  but it took the shot and wasn't in it! 


The other exterior pocket also was ample enough to hold some more necessities.  Here I used another ribbon trim I had in,  Made two loops on each end of the trim after tacking it down in to three sections.  The loops could hold the ear pieces to glasses and sunglasses, pens, stylists, keys, smaller purses, flash drive,  etc.... and I tacked that center part down too so it wouldn't gap and flip flop.  Of course a Velcro closure on this more open side was called for.


All of these items were contained on this exterior circled printed pocket. 

I'm thrilled with the outcome on this project.  I know I have this chartreuse aqua thingy going on and have been having it going on long before Bonnie Hunter's Easy Street QAL happened last winter.  I've loved chartreuse ever since I was 5 or six years old.  The only difference now is that I love aqua with it.  Back when I was young. I  loved it with purple- J'ADORE chartreuse!!  


While snapping photos I thought another Tammy  would be great for this ..................................

My attempt at an unorthodox exclamation point.   I know, I need help!  giggles.

Look at all the crochet items this TAMMY can hold!  You could easily feed your yarn through the openings just under the frame and it could contain your ball of yarn without it rolling all over the place while crocheting from it too. 


Another photo of the contents with the magnetic needle minder pulled off the bag,
just in case you missed it while attached in the above photo.   ;)


As I mentioned, I had to make mine larger because of the ball frame I purchased at Joanns.  The mouth of the frame is 8" wide and when fully opened is 3.5" wide.  (I wish that side of the opening was larger, I can't open this bad boy up large enough.)    I was able to use teh width of a legla sheet of paper (8.5") and just angled the top towards the outer edges of my paper pattern, keeping the integrity of the rest of the pattern and it worked.  Phew!!  I was worried for a while. 

The worst part with the construction was finding the cording then sewing it to the frame.  Thankfully the local bead store had this lime green cording  in with their Kumihimo supplies, (which happens to be a class a friend and I'll be taking tomorrow).  VBG


Also I got to thinking that this pattern lengthened could be fantastic for knitting items too. 

I pulled out my knitting needle organizer that I made almost 40 years ago to share with you. 

See how old that fabric is?   I used felt for the wording and did a simplistic drawstring bag back when I was making layettes for my babies.  I had a Montgomery Ward sewing machine (White)  that worked like a tank.  It had drop in Cams for decorative stitching and I used one of them for the top of this casing.  Crocheting yarn for the drawstrings.  Simple project making without a pattern but effective. 


It's not that pretty now, but it has been very serviceable and has helped me through the years.    Now wouldn't a Large mouthed tall skinny Tammy be perfect for this?     


I surely  can see more Tammy's being made in my future. 


Thanks Madamme Samm!
It's been a blast though I do have bruises on not one, but two thumbs!  Got those by  sewing that heft of fabric thickness onto the frame,
 but I must admit,
It was so totally worth it. 
Check out these other bloggers who also are sharing their creations of Tammy.

Bente, Jane  you are here! , Wendy, Geta , , Julia , Jan, Loralynn , Selina , Joan ,  Mara , Jan

Enjoy your Flag Day
and TTFN,

Jane

PS:  I also couldn't remiss from admitting that also while younger I loved watching Tammy on the TV screen.  How idyllic a life she seemed to have living with her Grandpapi and I personally loved her freshness and goodness.  Now I'm signing off while humming to the tune of:  Tammy, Tammy, Tammy's in love...  
a

Friday, February 15, 2013

It's All about Me....

Yikes!  I just realized....I need to start on my project for the It's All About Me blog hop which will be starting Monday, February 18th. Marlene from Stitching by the Lake will be our cheerleader. A  pattern from Amy Bradley was sent by Madamme Samm and we get to play and embellish anyway we think, it should be interesting!  My day on the blog hop tour is Thursday the 28th.    This also will fill the bill with my New FO for February.  ANother challenge that I participate with and is hosted by Barb of  the Cat Patches fame.  When doing these New FOs I love to be able to finish them quicker than the typical WIP around here. 
I've been looking at presenting myself in a couple of different ways, which one will win?   Stay tuned, I'll surprise you and myself too since hopefully I'll be blazing ahead.

Jane

Monday, January 14, 2013

WELCOME! In MY OWN WORDS


100,000 WELCOMES!!!


Yippee!  Today is my day to share with y'all the project I thought of to reflect a part of me.
First off, I'd like to thank the hostesses that set up this terrific Blog Hop.  Linda of Buzzing and Bumbling Blog and Madamme Samm from the  Sew We Quilt Blog, both are super talented ladies and so organized to host this and cultivate all the lovely talent that has been shown.  This project came to be because of your inspirational thoughts on  hosting this hop.   Thank you Both! 

How it began  is when I noticed on Linda's blog an invitation to join in a BLOG HOP about In Your Own Words and I put on my big girl panties and pledged that I'd  participate in  my first ever hop!!! 
 
Over the years many words have found there way onto my projects in different ways.  Since one of my desires this year is to focus on my PROGRESS.  Progress with my life, crafts, learning, maintenance of myself, home, family, friends, reading, beading,  and practice them all routinely.    I knew this hop was a synchronistic opportunity for me.  While thinking of the many different ideas of what to make or which word(s) to convey,  I mentally completed many and then ruled them out just as quickly in the next breath.  There were many words floating around in this lil' old head of mine while trying to figure out which  project could be done, be unique, besides something that would share a bit of my WIP self with you at the same time as hopefully make something that was on my HSY list.  (HSY stands for hasn't started yet.) 
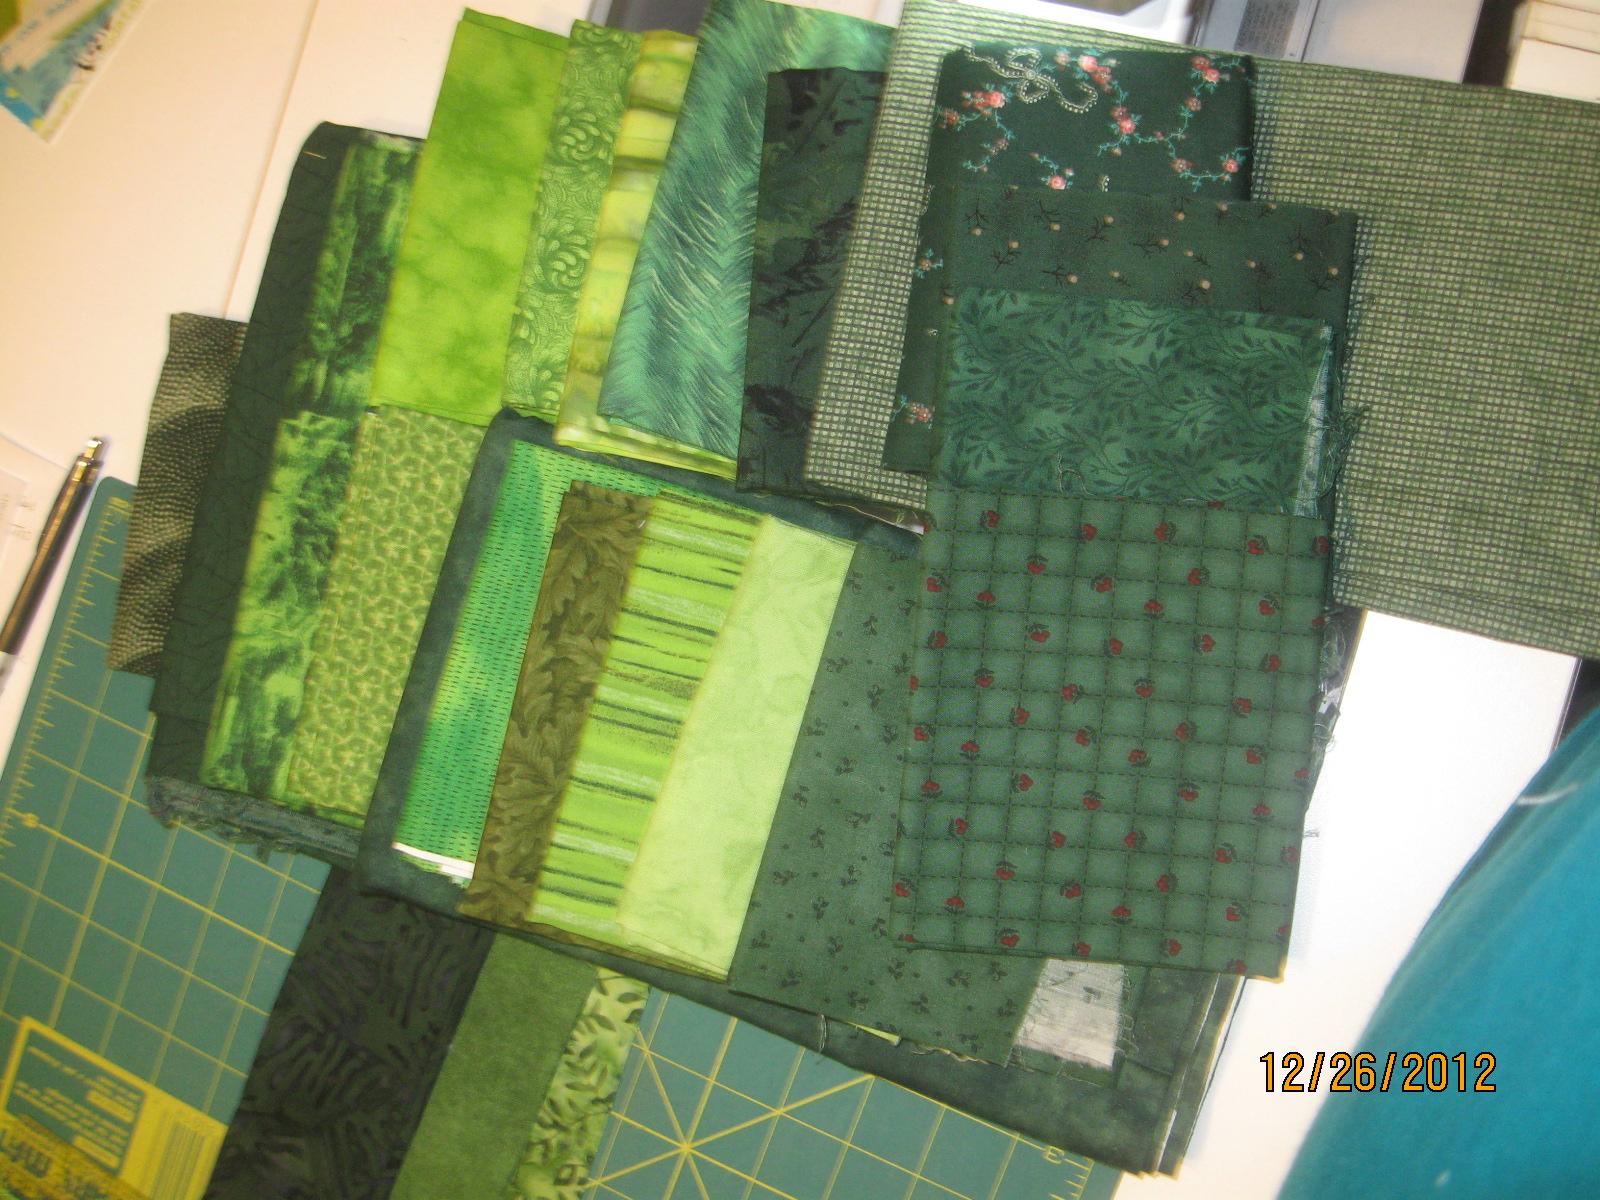
Since I love to decorate different monthly themed runners, wallhangings, pillows and such around my home through out the year, a table runner for my antique refrigerator in the dining room would do nicely.   Reading through my Creativity Journal from a time period of about 5 years ago I wrote, "Make a green scrappy tablerunner" an  ahhh.. haa... moment came and I knew what was meant to be. 

An Irish Table runner!   Because of my Irish Roots from my Dad's side, I've always loved anything Irish.   I remember as a little girl, my Dad singing to me, "When Irish Eyes are Smiling" and feeling safe and totally loved.  This project needed a word conveying my Irish nature.  Thinking that it should be in Gaelic  I started searching  Google to see which Gaelic phrase would be best as well as doable.   I didn't want something with too many words and I also wanted  something recognizable yet unique.  That's when I stumbed across Céad Mile Fáilte, A Hundred Thousand Welcomes and knew, that's it!  Thankfully, our home is busy with many visitors, both friends and family stopping by often and we love welcoming each and every one.

So into my little studio I went.  Going through my stash of greens pulling out the hues/prints/tones  that appealed to me and then rumaging around the cream section for a little contrasting  pinwheel accent I  envisioned going through
the 40 shades of green rails.    lol       PAY DIRT!  
 I just happened to have in my stash a perfect cream, a tone on tone print with just a hint of  peach,  but it also had gold sparkles going through out it for those pinwheels besides using it for the background of my word.     Now I'm thinking leprechaun, pots of gold, lol,  I know I know, I need help!!  Anyways,  I  did a little test of my idea of  using a magic marker on a small 4" x4 " piece o' that cream metallic sparkley fabric to make sure the color stayed colorfast and could hold true without bleeding.   It did.

 Little tip:  Always try out any markings on a small disposible sample before writing it on your  project!  This will check if it can stay if wanted or be able to wash out if needed.

Well, to get that word on my fabric I used Microsoft word and typed  the  Céad Mile Fáilte phrase about 10 times.  Then I played with the different styles and sized fonts, trying to get the look I knew in my head but couldn't find in my available  type fonts.  After reviewing and auditioning the printed out words for several days weeks  I was wondering, what to do?
Then it came to me, I could always use one of the larger size 92 in theTempus Sans ITC font that was the closest look for my pattern,  draw it on the fabric using it as a guide.  Afterwards it could be embellished in ir's style wherever I thought it needed to be.
I used a glue stick to hold the pattern guide and fabric together after centering both the fabric and the paper guide. {Thanks Linda for that tip about GLUE from the hop about quilting tips! I used to use pins but this was much easier!!!}
 
I laid them on my Sand Board so it couldn't slip then traced the words with a regular green permanent marker to outline the letters and colored it too.  In my mind it looked good but still wasn't done.  (This is my usual trend of thought, add a little bit more of this and perhaps more of that...... until typically it gets shelved as a UFO.  I am trying very hard to overcome this trait.  Making myself work through these rough spots and just get things done!)  Sorry... I digress.  
When it was totally colored in I used a hot iron to set the color  several times.

After pondering some more, figured that I'd embroider around all the letters.    Using a DMC Rayon thread (it has a lovely sheen) of a dark green # S501 that BTW, that actually matches the color of the dining room curtains,  I started embroidering using a back stitch with all 6 strands of thread on the first letter of each word.   This gave the  capital letters a bolder and more dramatic appearance.   I always use an interfacing fused onto my cakground fabric when stitching, it eliminates the shadow effect if youcarry a thread a little ways on the backside, but most times, I don't carry. 
I'm happy now with this but wondering what to do for the smaller letters? Six strands of thread on them will look awkward and chunky.  Wanting it to be organic in form but not defective is you know what I mean.  Also what if the green marker fades with washings and the years of service besides setting near a window with the UV rays shining in, how will this word hold up?
My answer:  "I'll embroider around every lower case letter too but use 2 strands of floss instead and use a stem stitch to change it up." YES, that's it!!!! 

They'll be outlined so something will remain, but won't compete with the capital letter of each word.  I'm happy now that it's coming to fruition.  At this stage it is now Saturday  night at  9:10 pm and I just finished the last letter. 
That rayon DMC was tricky to use since my skin on my fingers are chapped and my thunb is iterally  torn up  and keeps fraying a bit of thread every once in a while.  Yes Rayon is that fragile!  Band aids helped cover those areas so my thread would hold up without shredding.  I Looked hideous and ridiculous while stitching this  but it got done. 

With that end embroidered I now thought, what now?  It needs to be balanced and another embroidery needed to be made for the other end, perhaps Erin Go Bragh (this means Ireland Forever).  How ever will I get 'er done in time to share early Monday morning?   
 
Bobbin work! 
 
So I wound up some of Superior Threads, Razzle Dazzle thread onto a bobbin to create the phrase Erin Go Bragh.  I did that like I stated on the first section  but did a mirror image print out then  traced it onto the paper side of fusible interfacing.  Fused that with  the background fabric  and went to work stitching very carefully.  The worst part of this was getting all of those thread tails to the underside and tie a little knot after stitching each letter.    Ahh, sweet Success!  Next, onto my piecing. 
 
 
To make the blocks for the runner, this is what I did:
 (All of my photos can be enlarged to see the details better.)


To make the green fields I sewed a cream 2-1/2" square onto a green 2-1/2" X 6-1/2" Brick.  Marking a sewing line diagonally in the cream  square and sewing them in a half square triangle configuration with right sides together.    See photo at right.


Assemble 3 bricks together into your block.  This consists of 2 bricks with the HST ends laid on opposite sides with a plain green unsewn brick laid in oreo cookie style in the middle.   Make sure you have your HST placed on the block in the manner shown or you'll get a diamond center instead of a pinwheel spin when 4 of these blocks are sewn together. 

The pink fabric used here is just because of it's high contrast to the block's colors.


The pink fabric is just contrast - to show how those units will spin if laid out correctly.
Lay it out to be sure the orietation of the HST bricks are spinning around like a pinwheel. Make as many of these as you need for your finish.  I made a total of 16 blocks for this runner.
 
 
While working on this I actually thought a quilt in this pattern would be easy and fantastic. I'll probably get to that in another 5 years or so,
 just kidding!
 

    Sew the blocks together using an alternating direction  or a basketweave style.  Another way to phrase this is to have a vertical block next to a horizontal block, etc...  never have two blocks with the same orientation next to each other. 
    I pressed seams open to alleviate bulk.
    Center,  measure, measure, and MEASURE then cut  the embroidered panel to size.  I cut the 2 of  mine  5" x 12- 1/2"  each and then sewed to the ends of the runner.  
    Hand embroidered phrase with Rayon Thread and colored with a green permanent marker


    This was  so long and skinny that my photos didn't look right when I snapped a shot of the whole thing in one photo.  To show it I snapped several shots so you see all of it via different frames.   There are 4 pinwheels in the center of this runner with the ends in that cream finish.  It should look great with that mottled green print shown on the bottom, second one from the right.


    This project was so much fun creating and want to thank Linda and Madamme Samm again for inspiring it's design.  


    All that needs  to be done is to press, layer, quilt and then bind it. 


                    Piece o'cake!
     
    "Bobbin Play" work for the embroidery with the binding fabric shown underneath
    If you have time, please make time to visit the other bloggers who are participating in this hop.  The creativity shown is as beautiful and diversified as the bloggers who are sharing this "wordey  journey".

    Here they are:


    Clothes and Crafts (Maria K.)


    Simple Sew (Shirley T.)

    Woolie Mammoth (Anna B.)

    RocknQuilts (Mary Ann)


    Quiltsmiles ( that's ME!  )

      Thank you so much for stopping by and checking out this lil' bit o'me.   I'm now enjoying a cup of tea while I resume some of the housework duties I've neglected while I've been creating!   VBG!!!  

      Make sure you try to visit the other quilters sharing their projects on Day 6  of the In Your Own Words Hop aka Wordey Journey.  lol


    Jane

    PS:    If  you're interested you can hear the correct pronunciation and learn more about Céad Mile Fáilte, A Hundred Thousan Welcomes at these links.  Once again, 100,000 welcomes! and thank you for stopping by.   

    PPS:  I even thought a Ransome note styled letters in a phrase could sum me up too since most times I can get so scattered with all the time snatchers kidnapping around here! Though I always  find Joy in my journey along the way,  but that will be in another project on a different day!  Perhaps that kindle bag I'd like to make with a pocket for the cord...... 

    Tuesday, July 12, 2011

    Going, going, going along smoothly...

    My schedule is still rather busy and the days are just flying by. Actually got out to do some yard work with DH this am since cardiac rehab doesn't happen on Tuesdays, Mom is visiting a sister in Vt and the grand kids are now at day care. Felt so nice to work several hours without any interruptions, just the times needed to take a break with our health issues. We actually transplanted rhubarb and created a newer bed near the grape arbor.


    The technique to make this raised bed was done by the mode I learned last year on the garden tour. A gentleman with an absolutely gorgeous raised bed gardens told me how he did his so we are trying that this year. His method was to cut the sod in a 10x10 area on three sides and then flip it onto the tops on the neighboring sod. It allows an edge around the garden perimeter while elevating the interior of the garden. He said that by flipping the sod it kills the grass especially when mulched. We did leave one rhubarb plant alone since it is rather hot for transplanting. For the rest, we actually cut off the rhubarb vegetation and nested the split roots into a manure compost before burying them with thick layers of newspapers and finally topping them off with mulch. I hope this works, time will tell.


    The island garden where the rhubarb was, had overgrown badly with weeds, so I suggested we cut it down and then start working the soil. While in the middle of doing this, I thought, why bother having this garden here at all. We could have the perennials planted as edge type along the property boundary. So we plan to move the rest of the perennials in the spring, when we have more raised beds ready. It will be so much better than these smack dab in the middle of the backyard. As for the camper, instead of storing it near the back boundary of the woods, we could park it behind the garage, away from the eye sight line while on the decks,m but readily available and much handier behind the garage.

    Last week while Mom and I had a few hours we managed to make these small purses. Guess what the fabric is?

    They are Dish towel Bags. What cute towels. Mom brought these towels up with her from Florida thinking that it would be a fun and quick project and she was right. It took more time thinking about how to make them than it did actually making them. There is an outside pocket that has a separating seam down the center and the inside of mine, I also placed a pocket along one side, that's the aqua one. Mom place a smaller pocket inside her cahrtreuse one too.

    Here are a couple of snaps of my current focuses:

    Shabby Chic's BOM and I finally got the January block embroidered!

    The quilt I am making for Cheryl's nephew Chris.


    We did have a couple of family BBQs this past weekend. DH and our son stoked up the smoker grill and we dined on turkey, pork butt, bratwurst, kielbasa and even a few Chicken breasts. We didn't actually have all of that at one dinner, just smoked them all at once while it was smoking. Makes meals easy this week with everything all cooked, I just needed to throw some salads together. What a breeze!
    While the smoker was cooling down, the grand kids decided to have a little race, even the fourteen year old had fun. Of course I was still in the kitchen picking and washing up, so they called me outside to have a chuckle too!


    The 14 year old (PGS#3) actually was riding the hot Diego hot wheels too! Kids! Gotta love em!

    Jane

    Wednesday, March 16, 2011

    Back from the retreat

    Oh, it was so good to get away. This past weekend, several friends and I attended a quilting retreat that was held in Wadhams, NY. HEAVEN! The first photo up is Dance of the Dragonflies that Barbara was working on, a very intriguing pattern.


    I did bring many UFOs and PIGs and am very satisfied with what was accomplished. Thank goodness for my freind Trudy, she helped me tremendously! I actually brought a couple of my problem UFOs.
    First was the "Convergence wallhanging" that I started a couple of years ago. While piecing the rest of the top together, I somehow had twisted a section in reverse. The fabric I used was a single piece of Ricky Timms fabric and you'd think that I'd be able to tell at a glance that it was off. I could see that something was wrong in that center area, but was befuddled as to "How it was wrong". I think the medicines I'm on for my back are making me way too relaxed. Thank goodness for Trudy. I mentioned it to her and she could see it was wrong too and then she pointed out where my goof was. Now I could proceed as the project directions were written. So I did. Then whammo, I reversed another section again in the last steps. Looking at it, I just knew something was off but there again, I was at a loss as to what and where. So I was laying out how to work the borders and auditioning how it will look again with Trudy's eye and opinion requested. We figured I'll be going over to her house to finish the borders with some more Ricky Timms fabric or hers since she also does a beautiful job with fabric dyeing. So I flipped it aside to proceed with the next project, my Orange Crush quilt I started also several years ago.
    All of a sudden Trudy had figured out that I had again reversed a section during the convergence construction and mentioned if I undid that particular seam and turned that section around, it would work. AMAZING! She had been processing it AND had figured out how to correct it. Thank you, thank you, thank YOU! So I did some unsewing followed by some correct sewing. The borders will be coming shortly and I'll show you the finished wallhanging then.

    Next - on to assemble my Orange Crush blocks. Here's how it look now.


    After assembling the top I went in to the gameroom area to audition it for borders on the ping pong table when I found some more blocks in the plastic tote container that housed this UFO. Yeeks! I thought the top was done.
    So I started re-figuring if I had enough fabric of this and that to continue sewing blocks to make a 9 X 9 block grid layout( ach block is 9"). I needed an even design so I could use the cornerstone blocks I wanted to have for the final border treatment. Along comes Trudy.
    Are you catching a glimpse of the relief I have towards her expertise? She was in the back of the room when I held up the I thought finished center design and mentioned WOW! at a distance it was really bright, up close to it was nice but you really needed distance to really see it. So she questioned: That did I really need to add more blocks to finish it? Could I possibly add a wider border instead?
    I stopped my self-imposed drama of having to make more blocks and thought about it all the while imagining how it could be. She was right. I could ease the eye by allowing a bit more light into this quilt using my off white solid border areas, but also still embracing the design elements to finish it. So I drew out some options. I will be adding several layers of borders with a burgendy and white checkerboard border near the 2nd border area. Wrote all this down to continue it after I get home. Oh and I stillplan on having cornerstones in the border too. What a relief! Another potential problem eliminated.

    Then I proceeded to a kit, Tiki Tote I've had in for awhile.


    It's a clearance kit from Nancy's Notions. I got as far as the point where I was going to cut the woven webb handles. Needing to get my fray check out of my suitcase of tools and projects when I saw the table runner I had brought to figure out how to do a scalloped border. Without the blink of an eye I quickly changed projects. The tablerunner was longer than usual so I can oplace it over the antique refridgerator in the dining room. With having the over-sized pool table and ping pong table in the rec room I was able to draft out my scallop design for it. The use of dishes was also used to finalize this design.
    A friend from Montreal, Roz suggested that I draw on the reverse side of it to eliminate marking on the top. What a great suggestion! So using purple, brown, red and finally blue, I had my design. Blue being the correct line placements I was able to sew on that line in another color thread. This way I'll be able to know how to quilt it within that design area and then I'll cut it out on that same line. After getting back home I realized, now Janie, Why didn't you layer it and baste it there too? DUH! I should have. Oh well, some time just after I clean the kitchen floor I'll get to it.

    This photo is what Bridgette was working on. She is Tommi's SIL. I like the potential of a quilt made with HST units so I snaped a photo of this Carpenter's wheel variation. She's making a king sized quilt that her husband selected this block for her to make.


    The last photo is what Lois from Ottowa finished. She does amazing work and with the machine applique, which was truly invisible to the naked eye, she used a sewart international thread. Usually she gets it through Harriet Hardgrave's site. She gave me her email to connect with her about which settings she uses on her Bernina when she does the machine applique. I'll be contacting her shortly.


    Nice, bright and colorful isn't it. She also had some truly gorgeous and very unique quilts that she shared during show and tell. I wasn't able to get a snap of those though. She belongs to a group of quilters that challenge each other with art quilts. Amazing! A couple of friends and I would also like to expand our talents in the area of art quilts. We discussed how we'd go about it and hopefully it will come to fruition.

    Today, a fellow retreater and friend is coming over that I'll be showing her how to construct some note cards using strips of fabric. I haven't taught anything in quite awhile and hope to do it justice. Good thing she's a friend.

    Jane

    Tuesday, January 25, 2011

    I goofed.

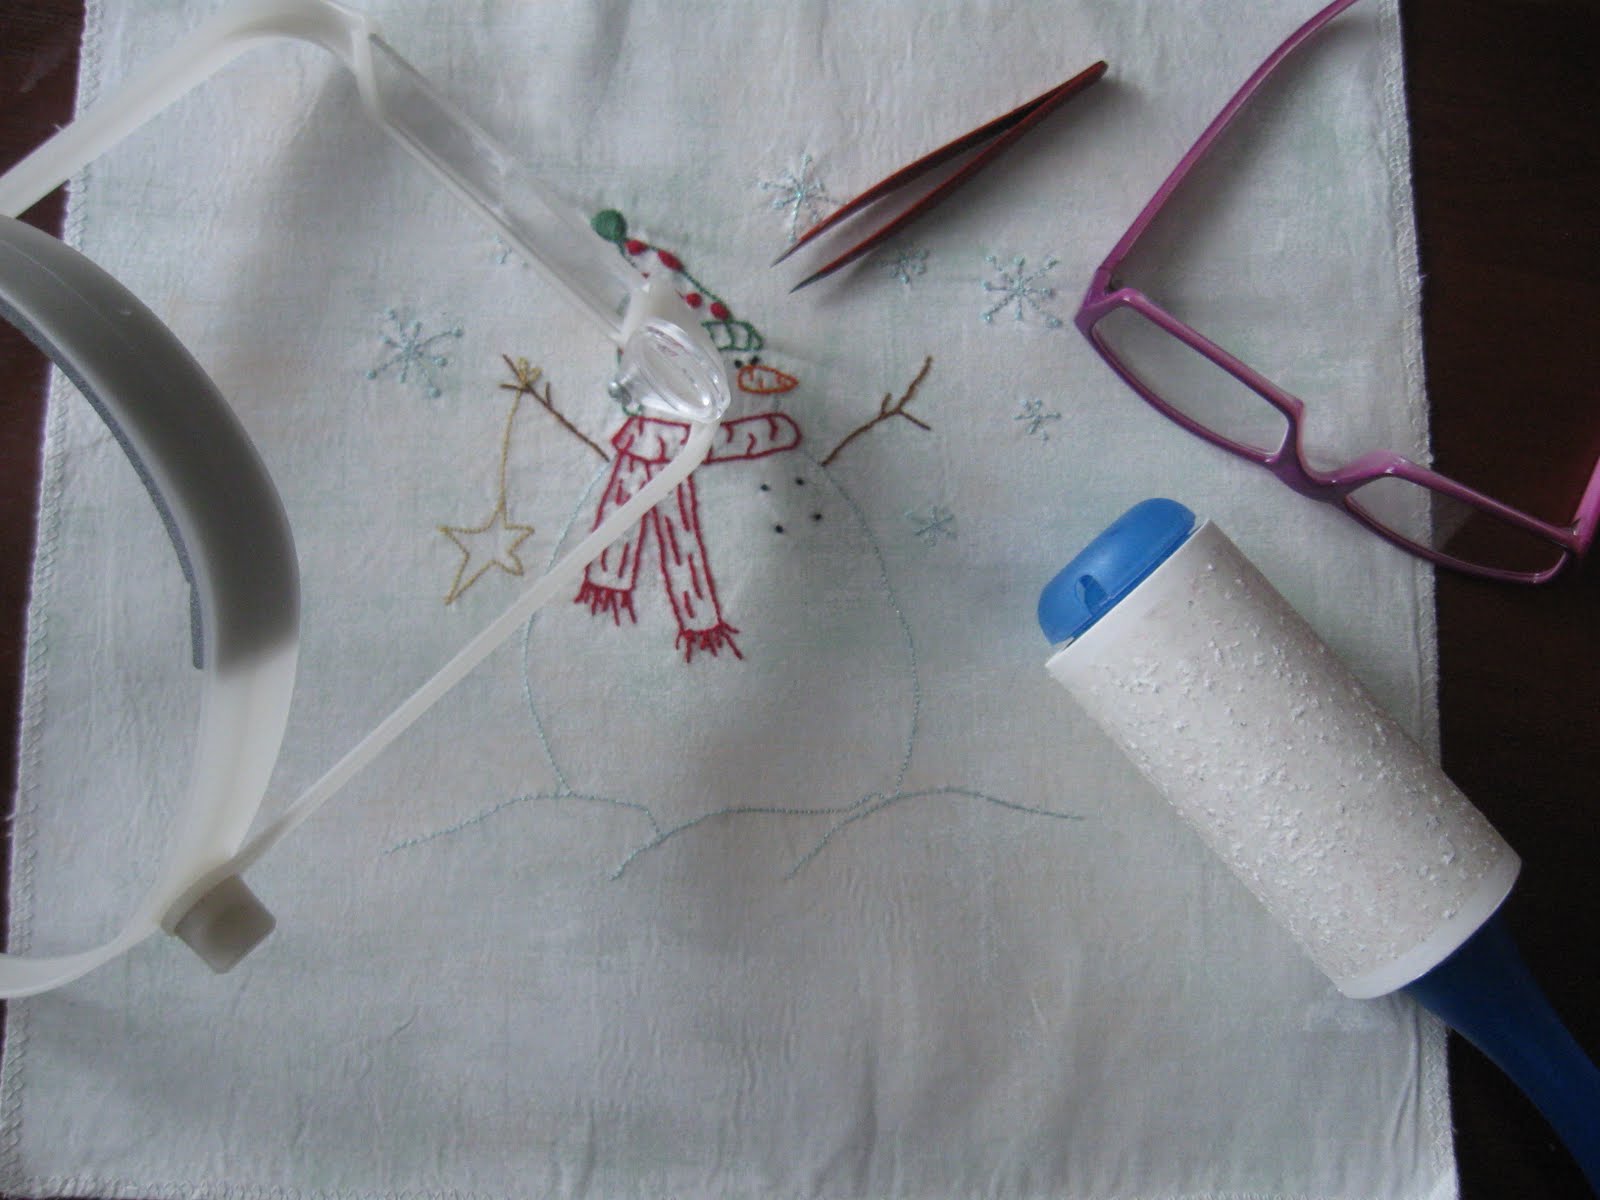
    A little while ago I was writing about using transfer ease for my Snow Much Fun embroidery part of a little quilt. But I really don't know where my head was. I have seen it several places on the web and with this transfer medium you can copy your embroidery design through a printer/copier and the design will show up on this medium. All you have to do is iron onto your fabric, use an interfacing and you're good to stitch.
    I thought at that time, ah haa! I think I have some of that in. So I went to my den where I store any printing and transfer papers and found my ink jet transfer paper, that all you have to do is iron onto fabric. I should have kept reading. This stuff is permanent. The snowman's stitching is done from the This and That pattern, "Snow Much Fun" and feeling very pleased with myself, I went and dunked into a sink full of water. Now imagine my surprise when that transfer element didn't dissolve off my fabric!


    So here I sit, instead of stitching, I'm using my magic eyes, a lint brush and a pair of tweezers trying to pull it all off. GGRrrrrrr! DH sat and watched me for a bit and calmly stated, won't it be easier to stitch it all over again. Of course I said yes, but the fabric I used was all I had and it was perfect for this design, so now I rip! How could I have goofed so bad?


    I did receive a couple of patterns that I really like. Perhaps I'll stitch out Snip for Queen while I am waiting for fabric for my first Blackbird Design, Easter Parade. I truly love this pattern and was lucky enough to find the pattern.


    Enjoy your day,
    Jane